AWS Cognito Authentication with Grafana Part 1: Local setup

In the AWS Cognito authentication with Grafana series, I will walk through how to set up Grafana with AWS Cognito user authentication. There are a few resources for this lying around in the Grafana forums and StackOverflow, but all of them are partial.
In this first part, I'll show you how to set up AWS Cognito for local installation, where we point all our OAuth callbacks to the local host. That is, Grafana will be running on your desktop.
AWS Cognito user pool
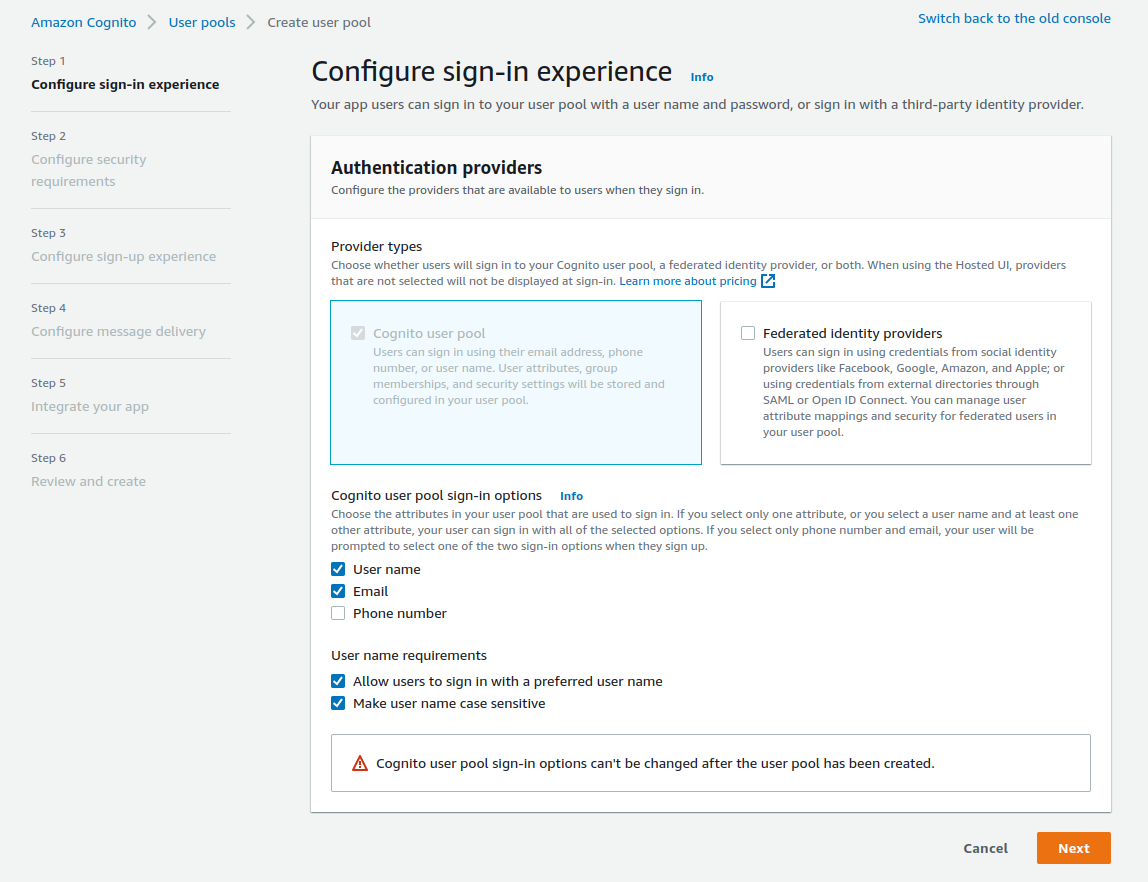
We need a user pool to hold all of our user records. So we head up to the Cognito service in the Amazon console and create a new user pool. For our sign-in option, we will only use the user's email address.
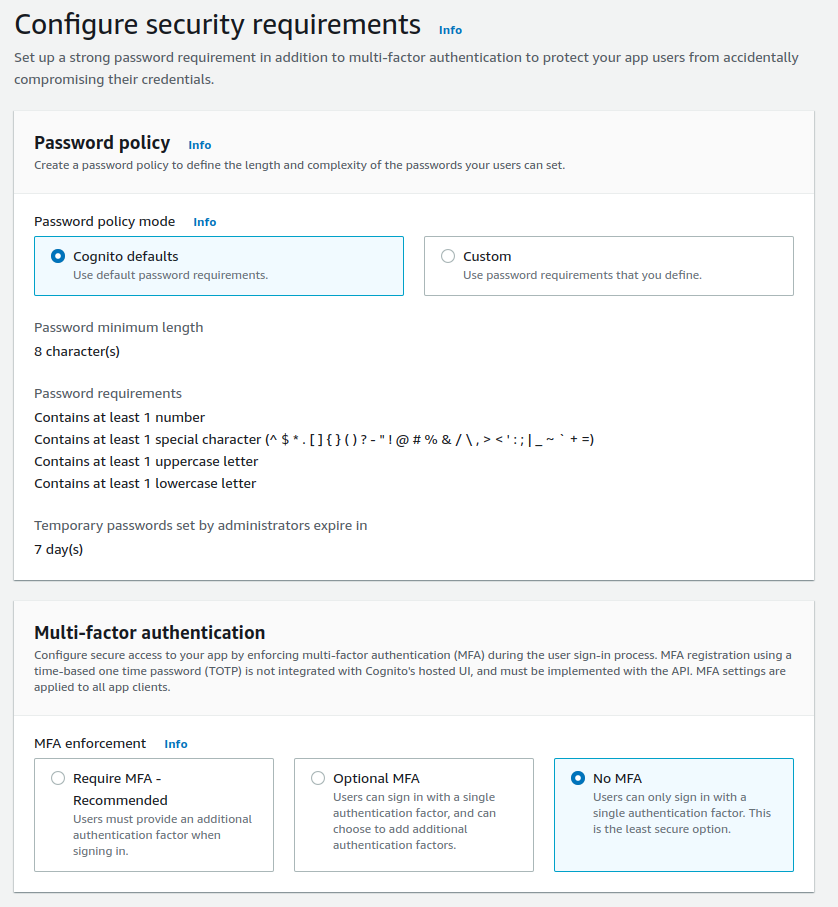
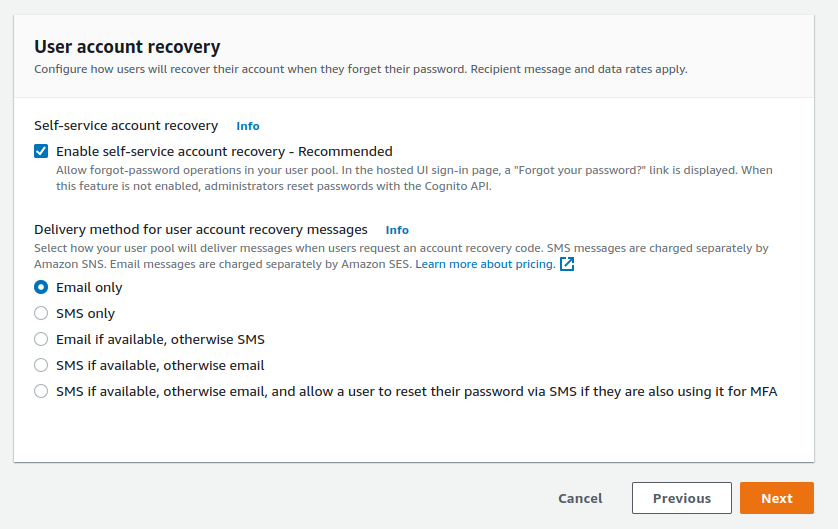
For the sake of simplicity, we'll use the default passwords options and disable the Multi-factor authentication (MFA). I strongly recommend MFA for any production-ready service. It will add another layer of security for your users. We also enable user account recovery by email, which is selected by default.
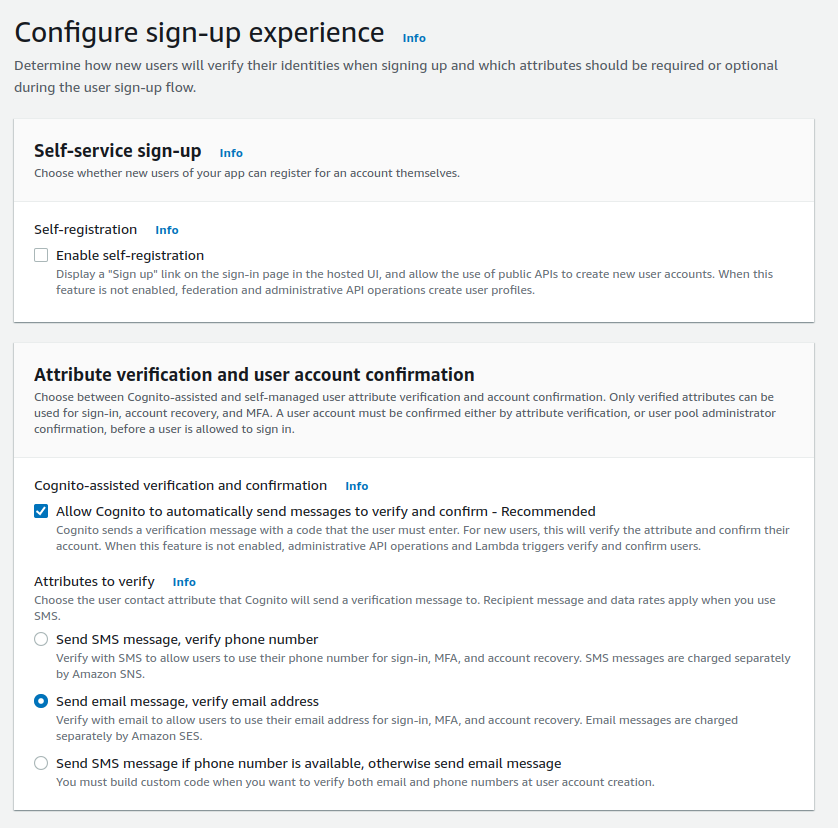
We want to be in control of who has access to our monitoring system, so we disable the user "self sign-up", but we leave the account confirmation by email enabled.
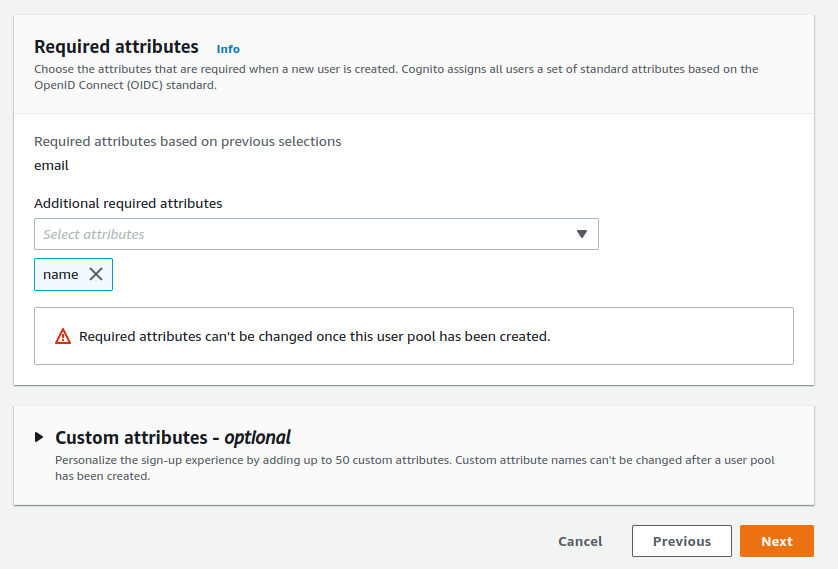
The user attributes are the details that are stored in the AWS Cognito and can be fetched during the authentication. In this example, I will only add users' "name" as an additional required attribute. Grafana will fetch this attribute as the user's full name.
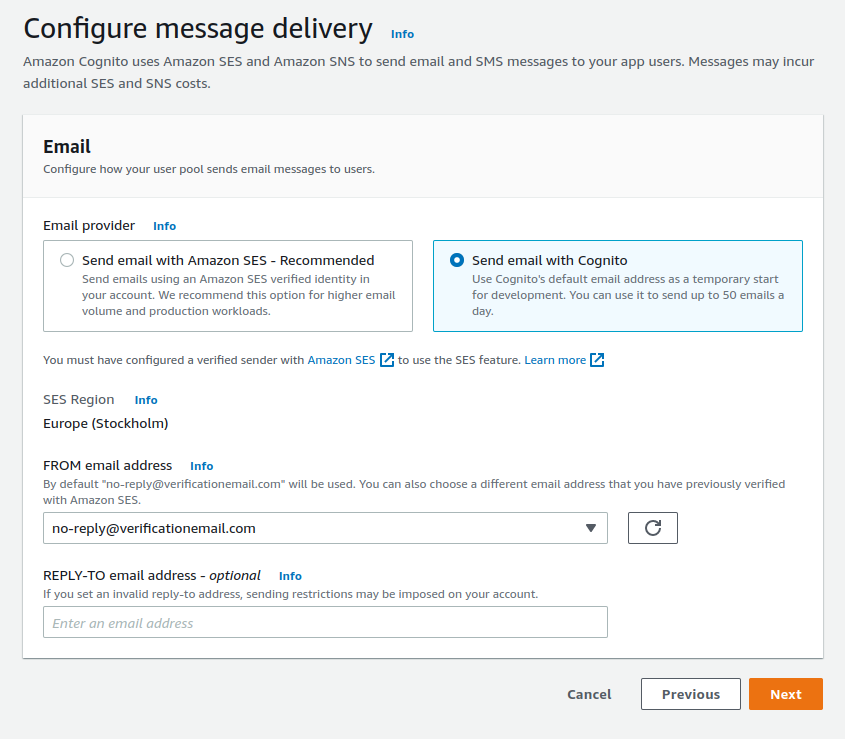
Switch the message delivery to "Send email with Cognito". This is more suitable for our development and small scale set up. For larger production systems, SES is more suitable.
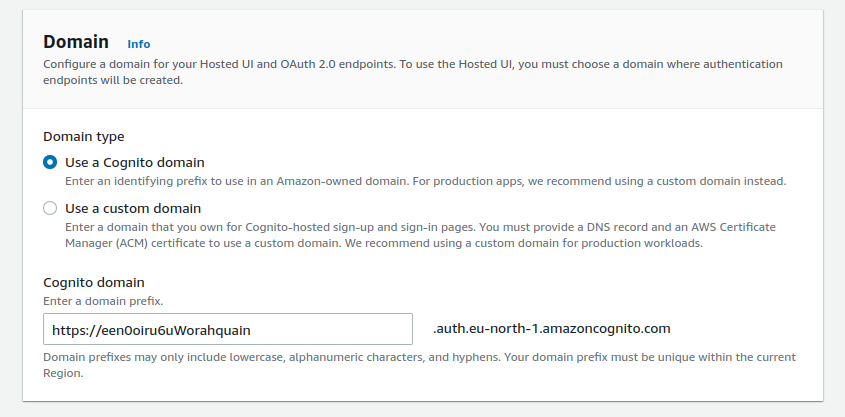
Next, we assign a unique name to the user pool and switch on the Hosted UI. This gives us a login page, which is managed by AWS.
The domain name is used to service the Hosted UI. For a development setup, the Cognito domain is fine. We choose our domain name randomly.
Now, we get to the client-side configuration. Here we determine how Grafana can access the user pool. App type "Other" is suitable for third-party applications such as Grafana. We need to generate a client secret in order to configure Grafana in a later phase. We need to allow, at least, /login/generic_oauth callback to allow running at our http://localhost:3000 to access the API. Be careful to choose "http" as the protocol. Cognito allows http access only for localhost for testing purposes. Services running on other domains are required to use https.
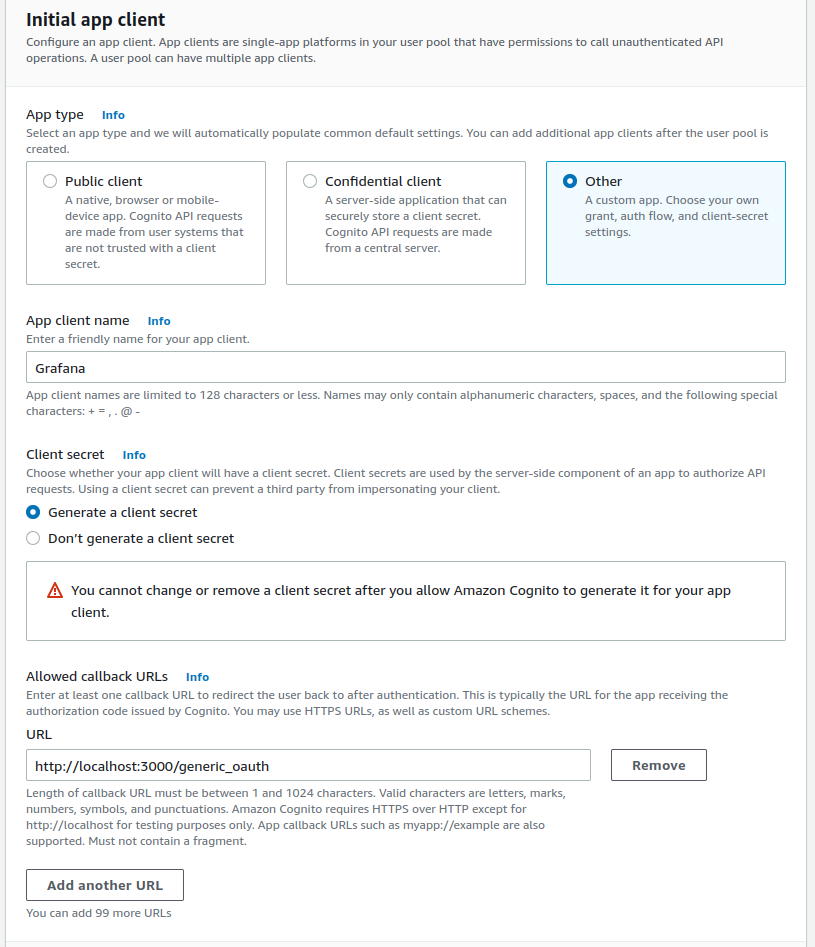
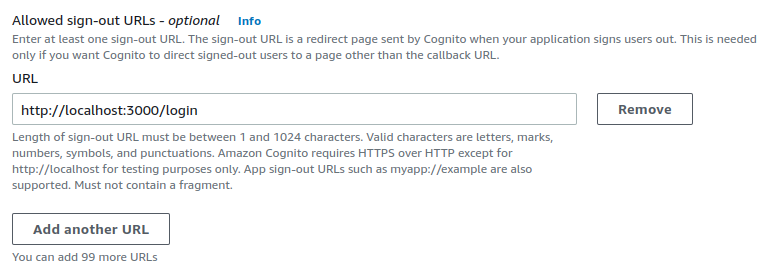
We add one more callback URL for the logout. This allows us to initiate Cognito logout from the Grafana signout button and redirect back to the login page.
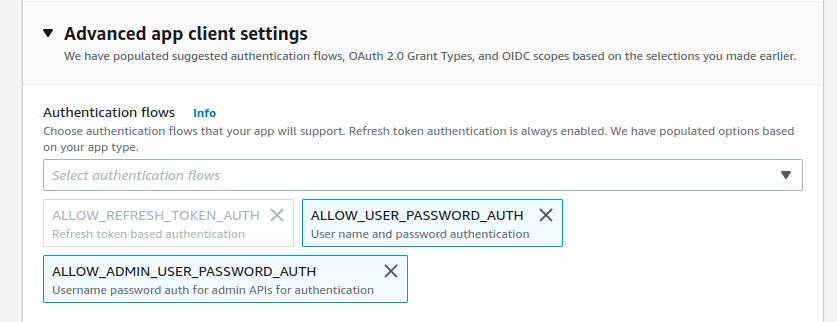
In the Advanced app client settings, we leave all else as default, but the Authentication flows and OpenID scopes.
We add ALLOW_USER_PASSWORD_AUTH and ALLOW_ADMIN_USER_PASSWORD_AUTH to the authentication flows. This enables email/password authentication from Grafana.
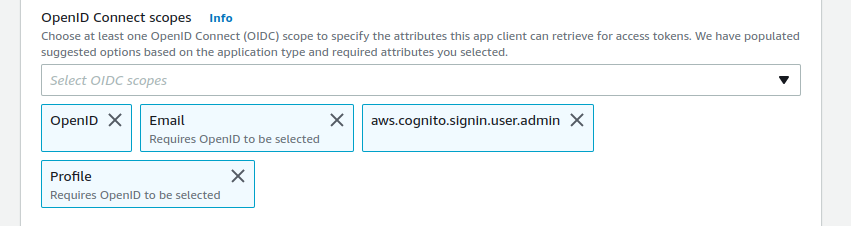
We remove the unused Phone number and add OpenID, aws.cognito.signin.user.admin and Profile. This will extend the Grafana access rights.
Finally, after reviewing the settings, we are ready to create the user pool.
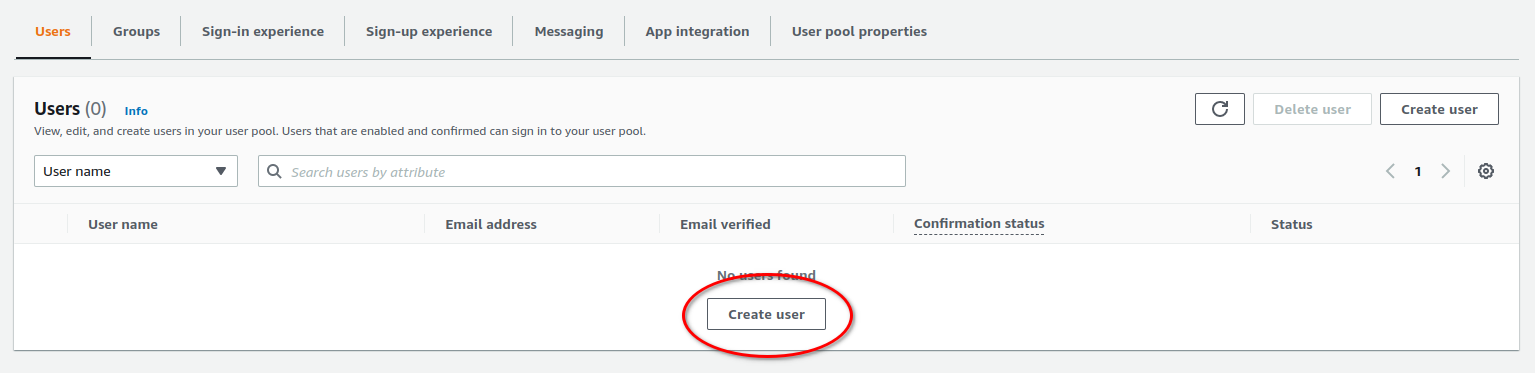
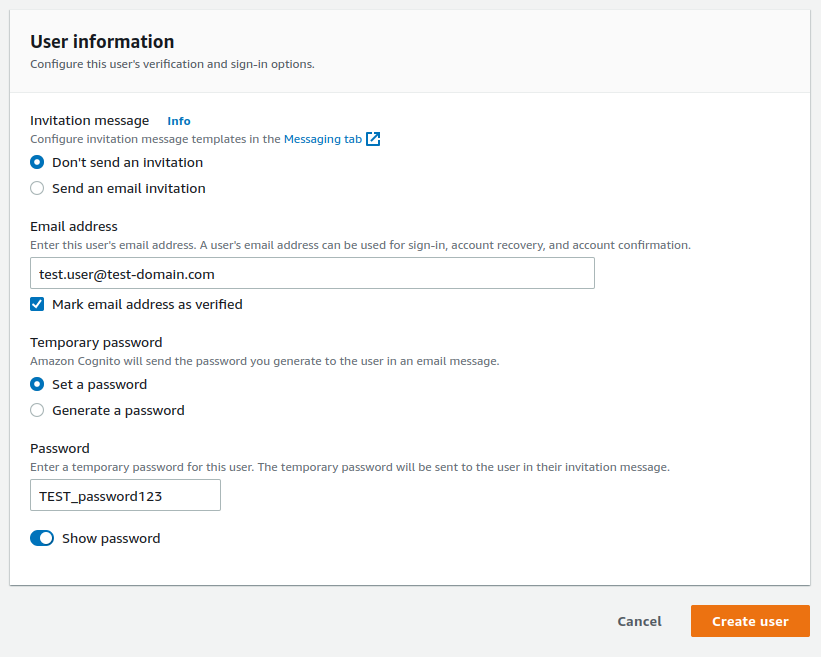
Before setting up Grafana, we can add our initial test user.
Minimal Grafana setup
We use docker-compose to set our minimal Grafana installation.
The docker-compose.yml configuration looks like
version: '3.3'
services:
  grafana:
    container_name: grafana
    image: grafana/grafana:8.4.2
    ports:
      - 3000:3000
    env_file: ./env
The Grafana setup is given in the env-file
# Point the server domain to localhost
GF_SERVER_DOMAIN = localhost

# Set Grafana know server URL
GF_SERVER_ROOT_URL = http://localhost:3000

# Session policies
GF_SESSION_COOKIE_SECURE = true
GF_SESSION_COOKIE_SAMESITE = lax

# Disable internal username/password authentication
GF_AUTH_BASIC_ENABLED = false

# Disable basic auth login form
GF_AUTH_DISABLE_LOGIN_FORM = true

# Cognito OAuth settings

# Enable OAuth
GF_AUTH_GENERIC_OAUTH_ENABLED = true

# Oauth service name
GF_AUTH_GENERIC_OAUTH_ENABLED_NAME = Cognito

# Allow Oauth sign-up (Grafana can add authorized users to the internal database)
GF_AUTH_GENERIC_OAUTH_ALLOW_SIGN_UP = true

# App client ID/Secret
GF_AUTH_GENERIC_OAUTH_CLIENT_ID = <AWS COGNITO CLIENT ID>
GF_AUTH_GENERIC_OAUTH_CLIENT_SECRET = <AWS COGNITO CLIENT SECRET>

# Information scope
GF_AUTH_GENERIC_OAUTH_SCOPES=email profile aws.cognito.signin.user.admin openid

# AWS Cognito OAuth endpoints
GF_AUTH_GENERIC_OAUTH_AUTH_URL=https://<COGNITO DOMAIN>.auth.<AWS REGION>.amazoncognito.com/oauth2/authorize
GF_AUTH_GENERIC_OAUTH_TOKEN_URL=https://<COGNITO DOMAIN>.auth.<AWS REGION>.amazoncognito.com/oauth2/token
GF_AUTH_GENERIC_OAUTH_API_URL=https://<COGNITO DOMAIN>.auth<AWS REGION>.amazoncognito.com/oauth2/userInfo

# Logout callback to redirect signout from Grafana to AWS Cognito OAuth signout
GF_AUTH_SIGNOUT_REDIRECT_UR L= https://<COGNITO DOMAIN>.auth.<AWS REGION>.amazoncognito.com/logout?client_id=<AWS COGNITO CLIENT ID>&logout_uri=http://localhost:3000/login
The AWS Cognito client ID and secret can be obtained from the App client information.
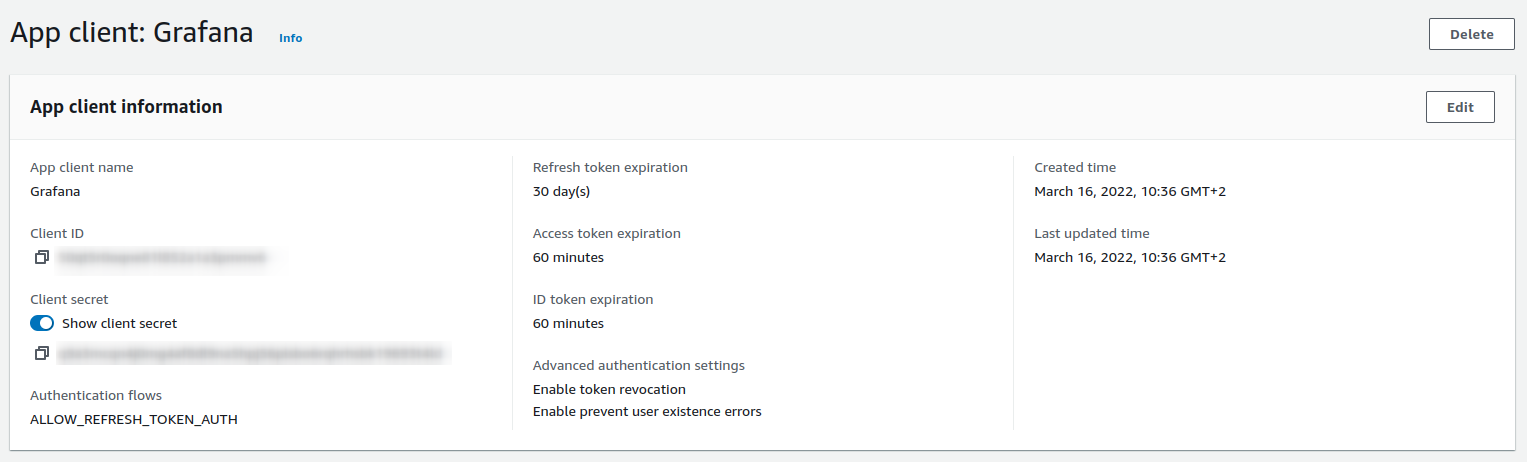
AWS Cognito domain was during the user pool configuration.
Fire up the Grafana service by running docker-compose up and head to localhost:3000 in your browser.
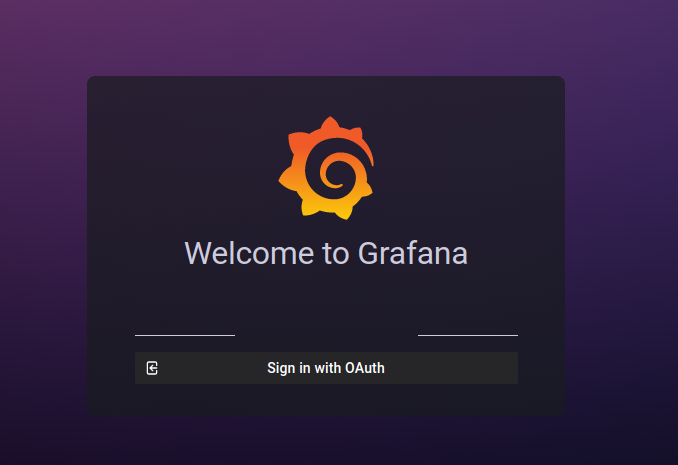
Click on "Sign in with OAuth" and you should be directed to the AWS hosted sign-in UI
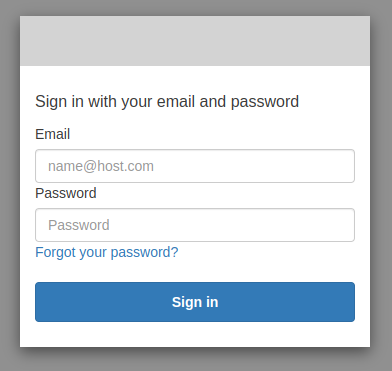
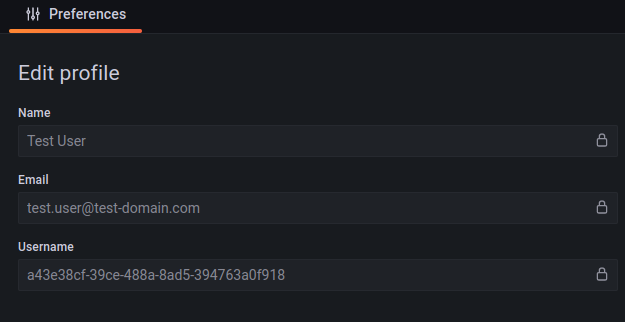
Sign in with the test user credentials: [email protected] / TEST_password123. Change the password and give the test user name. After this, you should be logged in to Grafana. Grafana picks the username from Cognito user UUID.
What's up next?
In the upcoming parts of the series, we will dig deeper into the user attributes and how to incorporate them with Grafana. We will also have a look at how to configure Cloudfront caching policies, to support OAuth session information and cookies. Finally, we will put it all together with Terraform for easy deployment.